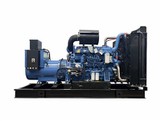
Hey there! I'm an 8kw diesel generator supplier, and today I'm gonna walk you through the process of replacing the fuel filter of an 8kw diesel generator. It might seem a bit daunting at first, but with the right steps and a bit of patience, you'll be able to do it like a pro.
Why Replace the Fuel Filter?
Before we dive into the replacement process, let's talk about why it's so important to change your fuel filter regularly. The fuel filter plays a crucial role in keeping your generator running smoothly. It traps dirt, debris, and other contaminants that can be present in the diesel fuel. Over time, these particles can clog the filter, reducing fuel flow and causing your generator to run less efficiently. In some cases, a clogged filter can even lead to engine damage. By replacing the fuel filter at the recommended intervals, you can ensure that your generator continues to perform at its best and avoid costly repairs down the road.
Tools and Materials You'll Need
- New fuel filter (make sure it's compatible with your 8kw diesel generator)
- Wrench or socket set
- Container to catch any spilled fuel
- Rags or paper towels to clean up spills
- Gloves to protect your hands from fuel
Step-by-Step Guide to Replacing the Fuel Filter
Step 1: Prepare Your Generator
First things first, you need to make sure your generator is turned off and has had a chance to cool down. Working on a hot generator can be dangerous, as you could burn yourself or cause a fire. Once the generator is cool, locate the fuel filter. It's usually a cylindrical or rectangular-shaped device that's connected to the fuel line.
Step 2: Relieve the Fuel Pressure
Before you start removing the old filter, you need to relieve the fuel pressure in the system. This will prevent fuel from spraying out when you disconnect the filter. To do this, you can either find the fuel pressure relief valve (if your generator has one) and open it, or you can loosen the fuel line connection slightly to let the pressure escape. Be careful when doing this, as fuel can be flammable.
Step 3: Remove the Old Fuel Filter
Once the fuel pressure is relieved, use your wrench or socket set to loosen the fittings that connect the fuel filter to the fuel lines. Be sure to have your container ready to catch any fuel that might spill out. Once the fittings are loose, carefully remove the old fuel filter from the generator.


Step 4: Install the New Fuel Filter
Take your new fuel filter and make sure it's the correct one for your generator. Check the manufacturer's instructions if you're not sure. Then, apply a thin layer of diesel fuel to the gasket on the new filter. This will help create a good seal. Carefully install the new filter in the same position as the old one, and tighten the fittings using your wrench or socket set. Make sure they're snug, but don't over-tighten them, as this could damage the fittings.
Step 5: Prime the Fuel System
After the new filter is installed, you need to prime the fuel system to get fuel flowing through the new filter. This can usually be done by using the hand primer pump (if your generator has one). Pump the primer until you feel resistance, which indicates that fuel is flowing through the system. If your generator doesn't have a hand primer pump, you may need to follow the manufacturer's instructions for priming the system.
Step 6: Check for Leaks
Once you've primed the fuel system, start the generator and let it run for a few minutes. Check around the fuel filter and all the connections for any signs of fuel leaks. If you notice any leaks, turn off the generator immediately and tighten the fittings or replace the gasket if necessary.
Step 7: Clean Up
After you've confirmed that there are no leaks, clean up any spilled fuel using your rags or paper towels. Make sure to dispose of the old fuel filter and any contaminated rags properly, following local regulations.
Tips for Maintaining Your Fuel Filter
- Follow the Manufacturer's Recommendations: The manufacturer of your generator will usually provide guidelines on how often to replace the fuel filter. Make sure to follow these recommendations to keep your generator in good condition.
- Use High-Quality Fuel: Using clean, high-quality diesel fuel can help extend the life of your fuel filter. Avoid using fuel that has been sitting in a container for a long time, as it may contain more contaminants.
- Inspect the Filter Regularly: Even if you're following the recommended replacement schedule, it's a good idea to inspect the fuel filter periodically. Look for signs of clogging, such as a dark or dirty appearance, or a decrease in fuel flow. If you notice any problems, replace the filter as soon as possible.
Conclusion
Replacing the fuel filter of an 8kw diesel generator is a relatively simple task that can have a big impact on the performance and longevity of your generator. By following these steps and taking good care of your fuel filter, you can keep your generator running smoothly and avoid costly repairs.
If you're in the market for an 8kw diesel generator or need any other parts or accessories, we're here to help. We offer a wide range of 8kw Diesel Generator, Mobile Diesel Generator, and Diesel Generator For Camping. Contact us today to start a purchase negotiation and find the perfect generator for your needs.
References
- Generator manufacturer's user manual
- Diesel fuel system maintenance guides