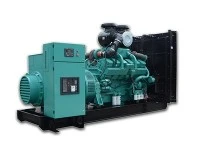
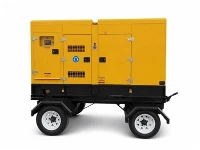
Hey there! If you're reading this, chances are you've either got a commercial generator that's giving you battery troubles or you're just being proactive and want to know how to handle a battery replacement when the time comes. Well, you've come to the right place! I'm from a commercial generator supply company, and I've dealt with all sorts of generator issues, including battery replacements. So, let's dive right in and learn how to replace the battery in a commercial generator.
Why Replace the Battery?
First things first, you might be wondering why you need to replace the battery in the first place. A generator's battery is crucial for starting the engine. Over time, batteries wear out due to factors like regular use, exposure to different temperatures, and just plain old age. If your generator is having trouble starting, or if the battery indicator on your control panel shows a low charge even after charging, it's likely time for a replacement.
Safety First
Before you even think about touching the battery, safety should be your top priority. Working with generator batteries involves dealing with high-voltage and potentially corrosive substances. Here are some safety tips to keep in mind:
- Wear protective gear: Put on safety glasses, gloves, and a protective apron.
- Disconnect the power: Make sure the generator is turned off and unplugged from any electrical sources.
- Work in a well-ventilated area: Batteries can release hydrogen gas, which is flammable. So, open the doors and windows or work outside.
Tools You'll Need
To replace the battery in your commercial generator, you'll need a few tools:
- Wrench set: You'll need the right size wrench to loosen and tighten the battery terminals.
- Battery terminal cleaner: This will help clean the terminals for a better connection.
- Baking soda and water solution: To neutralize any acid spills.
- New battery: Make sure you get the right type and size for your generator. You can check your generator's manual or consult with us at our supply company. We offer a range of generators, including the 26kW Generator, 55kVA Generator, Standby Diesel Generator Set, Diesel Generator 400V, and Marine Diesel Generator Set. We can also help you find the perfect battery for your specific model.
Step-by-Step Battery Replacement
Now that you've got your safety gear on and your tools ready, let's get to the actual replacement process.
Step 1: Locate the Battery
The battery in a commercial generator is usually located in an easily accessible compartment. It could be on the side, front, or back of the generator. Refer to your generator's manual if you're having trouble finding it.


Step 2: Disconnect the Battery Cables
Start by disconnecting the negative (-) cable first. Use your wrench to loosen the nut on the terminal and carefully remove the cable. Make sure the cable doesn't touch any metal parts of the generator to avoid short-circuiting. Then, disconnect the positive (+) cable in the same way.
Step 3: Remove the Old Battery
Once the cables are disconnected, carefully lift the old battery out of its compartment. Some batteries may be held in place with a bracket or strap. If so, use your wrench to remove the hardware before lifting the battery.
Step 4: Clean the Battery Compartment and Terminals
Use the battery terminal cleaner to scrub the battery terminals and the cable ends. This will remove any corrosion and ensure a good electrical connection. If there are any acid spills in the compartment, neutralize them with a baking soda and water solution. Then, dry the compartment thoroughly.
Step 5: Install the New Battery
Place the new battery in the compartment, making sure it fits securely. If there was a bracket or strap, reattach it to hold the battery in place.
Step 6: Reconnect the Battery Cables
First, connect the positive (+) cable to the positive terminal of the battery. Tighten the nut with your wrench until it's snug. Then, connect the negative (-) cable to the negative terminal.
Step 7: Test the Generator
Once the battery is connected, turn on the generator and see if it starts. If it doesn't, double-check the cable connections and make sure the battery is properly charged.
Maintaining Your Generator Battery
After replacing the battery, it's important to maintain it properly to extend its lifespan. Here are some tips:
- Regular inspections: Check the battery terminals for corrosion and tightness regularly.
- Keep it charged: If the generator isn't in use for a long time, make sure to keep the battery charged. You can use a battery charger or a float charger.
- Store it properly: If you need to store the battery, keep it in a cool, dry place and make sure it's fully charged.
Conclusion
Replacing the battery in a commercial generator isn't as complicated as it might seem. By following these steps and taking the necessary safety precautions, you can do it yourself and save some money on repair costs. And if you ever need help choosing the right battery or generator for your needs, don't hesitate to reach out to us. We're here to support you and ensure that your generator runs smoothly.
If you're in the market for a new commercial generator or need to stock up on batteries and other parts, we'd love to have a chat with you. Just get in touch, and we can start discussing your requirements and finding the perfect solutions for your business.
References
- Generator User Manuals
- Battery Manufacturer's Guides